Heroku Postgres Row Limit Email Notifications
Share
So, you’ve got a side project hosted with Heroku, you only have basic database requirements so the 10,000 row limited Postgres dev plan seems like a good choice and could possibly be a free alternative for a descent amount of time until you need to upgrade.
Heck, at $35 a month per dyno, you need to try and save some money somewhere, right?
Take for example one of my side projects, it’s called NoteShred.com. It allows you to send password protected, encrypted notes to people over the internet with a unique URL and have the note automatically destroy its self after it’s been read.
The beauty of this application is that it is constantly deleting rows from the database every time a note is “shredded“, so a 10,000 row count is actually a descent amount of space for this application.
The problem is that 10,000 isn’t a huge number, and all it takes is one big spike of traffic and you’ve hit the limit.
Heroku provides a basic alerting service that will tell you once you’re at 7,000 records and again once you’ve hit the limit. You will have 24 hours to get your row count back under the limit before you will lose write access to your database. (Thanks to @hgmnz and @ctshryock for pointing this out)
More Info Here.
Unfortunately, This is not configurable and the cut off may come at a bad time, say if you’re on holidays or are not able to dive in and trim back the records before this 24 hour window expires.
The 7,000 row alert is nice how ever not terribly useful for applications like NoteShred where you have a slow creeping database and the difference between 7,000 records and 10,000 records is a large gap in time.
I am most likely going to disregard the 7,000 row alert email because I still have 3,000 left, the next email would be informing me that I have hit the limit and have 24 hours to get it back under control.
A configurable threshold with a series of alerts leading up to the cut off point would be more useful, or even just an alert closer to the limit, say at 9000 rows.
You want to keep an eye on this row count, you can do so using the Rails built in Mailer and a basic Rake task with this simple solution and be alerted when your application reaches a threshold nearing that 10,000 mark. You can easily customize this rake task to alert you at times when feel it’s more useful than the standard 7,000 and 10,000 alerts.
In a nutshell, this will:
- Check your row count every hour
- Email you if you’re over the threshold
In your Rails application, under the folder /lib/tasks/ create the file report.rake
Enter the following
namespace :report do
  task :heroku_row_report => :environment do
    #Send Warning Email If Over The 9000 Threshold
    warning_threshold = 9000
    query = 'select sum(n_live_tup) as records from pg_stat_user_tables'
    record_count = ActiveRecord::Base.connection.execute(query)[0]['records'].to_i
    if record_count > warning_threshold
      puts "Uh Oh .. We're Up To #{record_count} Records"
      Mailer.heroku_row_report(record_count.to_s).deliver
    else
      puts "We Cool, Only #{record_count} Records"
    end
  end
end
Simply change the
warning_threshold = 9000
part to what ever number you want to be alerted at
You will need an action in your Mailer that will send you the email if the rake task discovers your row count is over the threshold.
Add the following to your Mailer class (/app/mailers/mailer.rb)
def heroku_row_report(rows)
  @rows = rows
  mail :to => "your_email@domain.com", :subject => "Heroku Row Report"
end
Now add the view (/app/views/mailer/heroku_row_report.html.erb)
<h3>Heroku Row Count Warning</h3>
Your Heroku Row Count Is At: <%= @rows %>
Obviously you can substitute the above mailer action and view with a custom one of your choosing.
At this point, let’s test the rake task.
Open up your console and change into your Rails application directory, then run:
heroku run rake report:heroku_row_report
You should see a response on the screen that looks like the following:
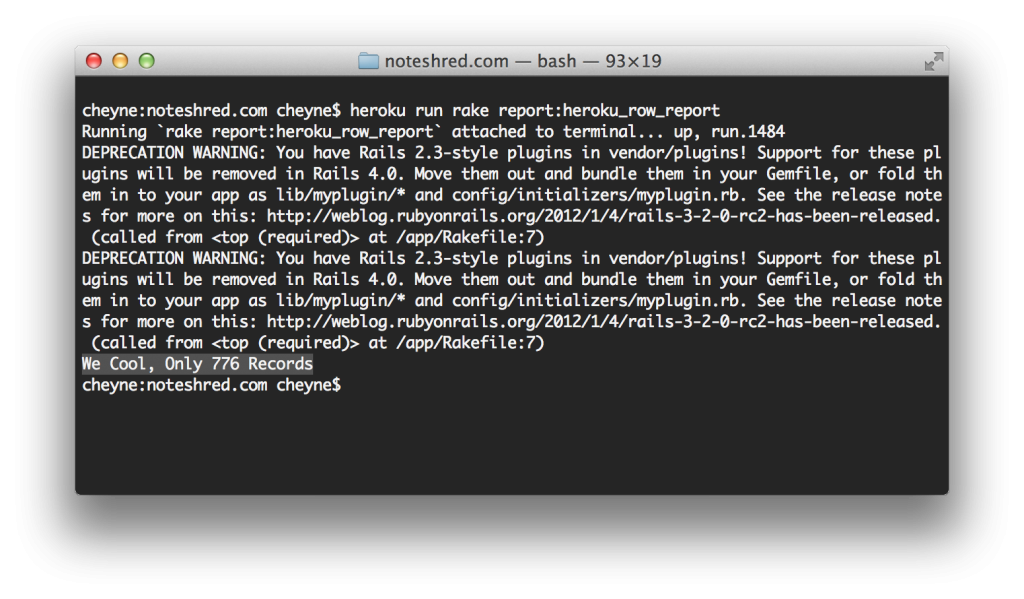
Remember, you will only be emailed if the row count exceeds the threshold you set earlier, so in the case of my screenshot, I would not be emailed.
If you wanted to get an email all the time, a simple way to do this is to change the threshold to 0.
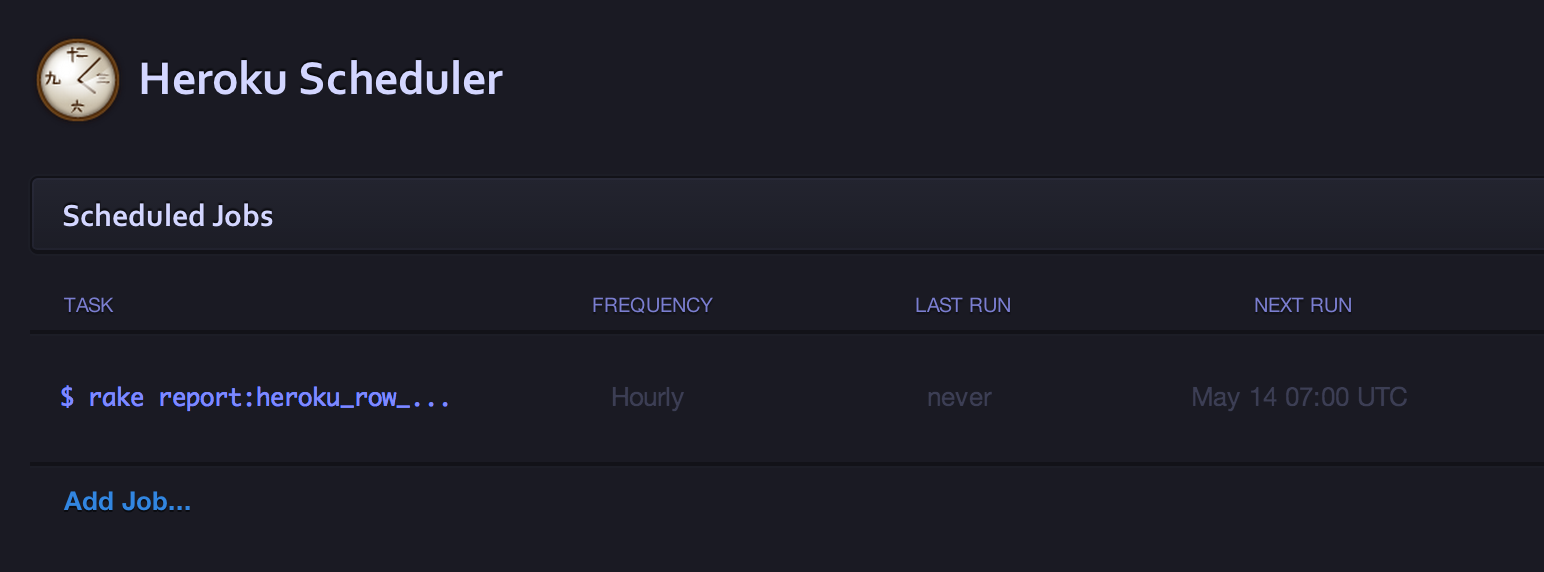
You’ll want this rake task to run every hour or so. This is simple to do with the free Heroku Scheduler found here: https://addons.heroku.com/scheduler.
Simply add the Heroku Scheduler add-on to your project, jump into the scheduler dashboard, create a new job and enter
rake report:heroku_row_report
as the task to run.
Set the job to run every 1 hour, daily, and you’re done